Vanilla, Toffee and Pecan Ice Cream ~ Helado de Vainilla, Caramelo y Nueces

*Podéis ver esta receta en español al final del post. 

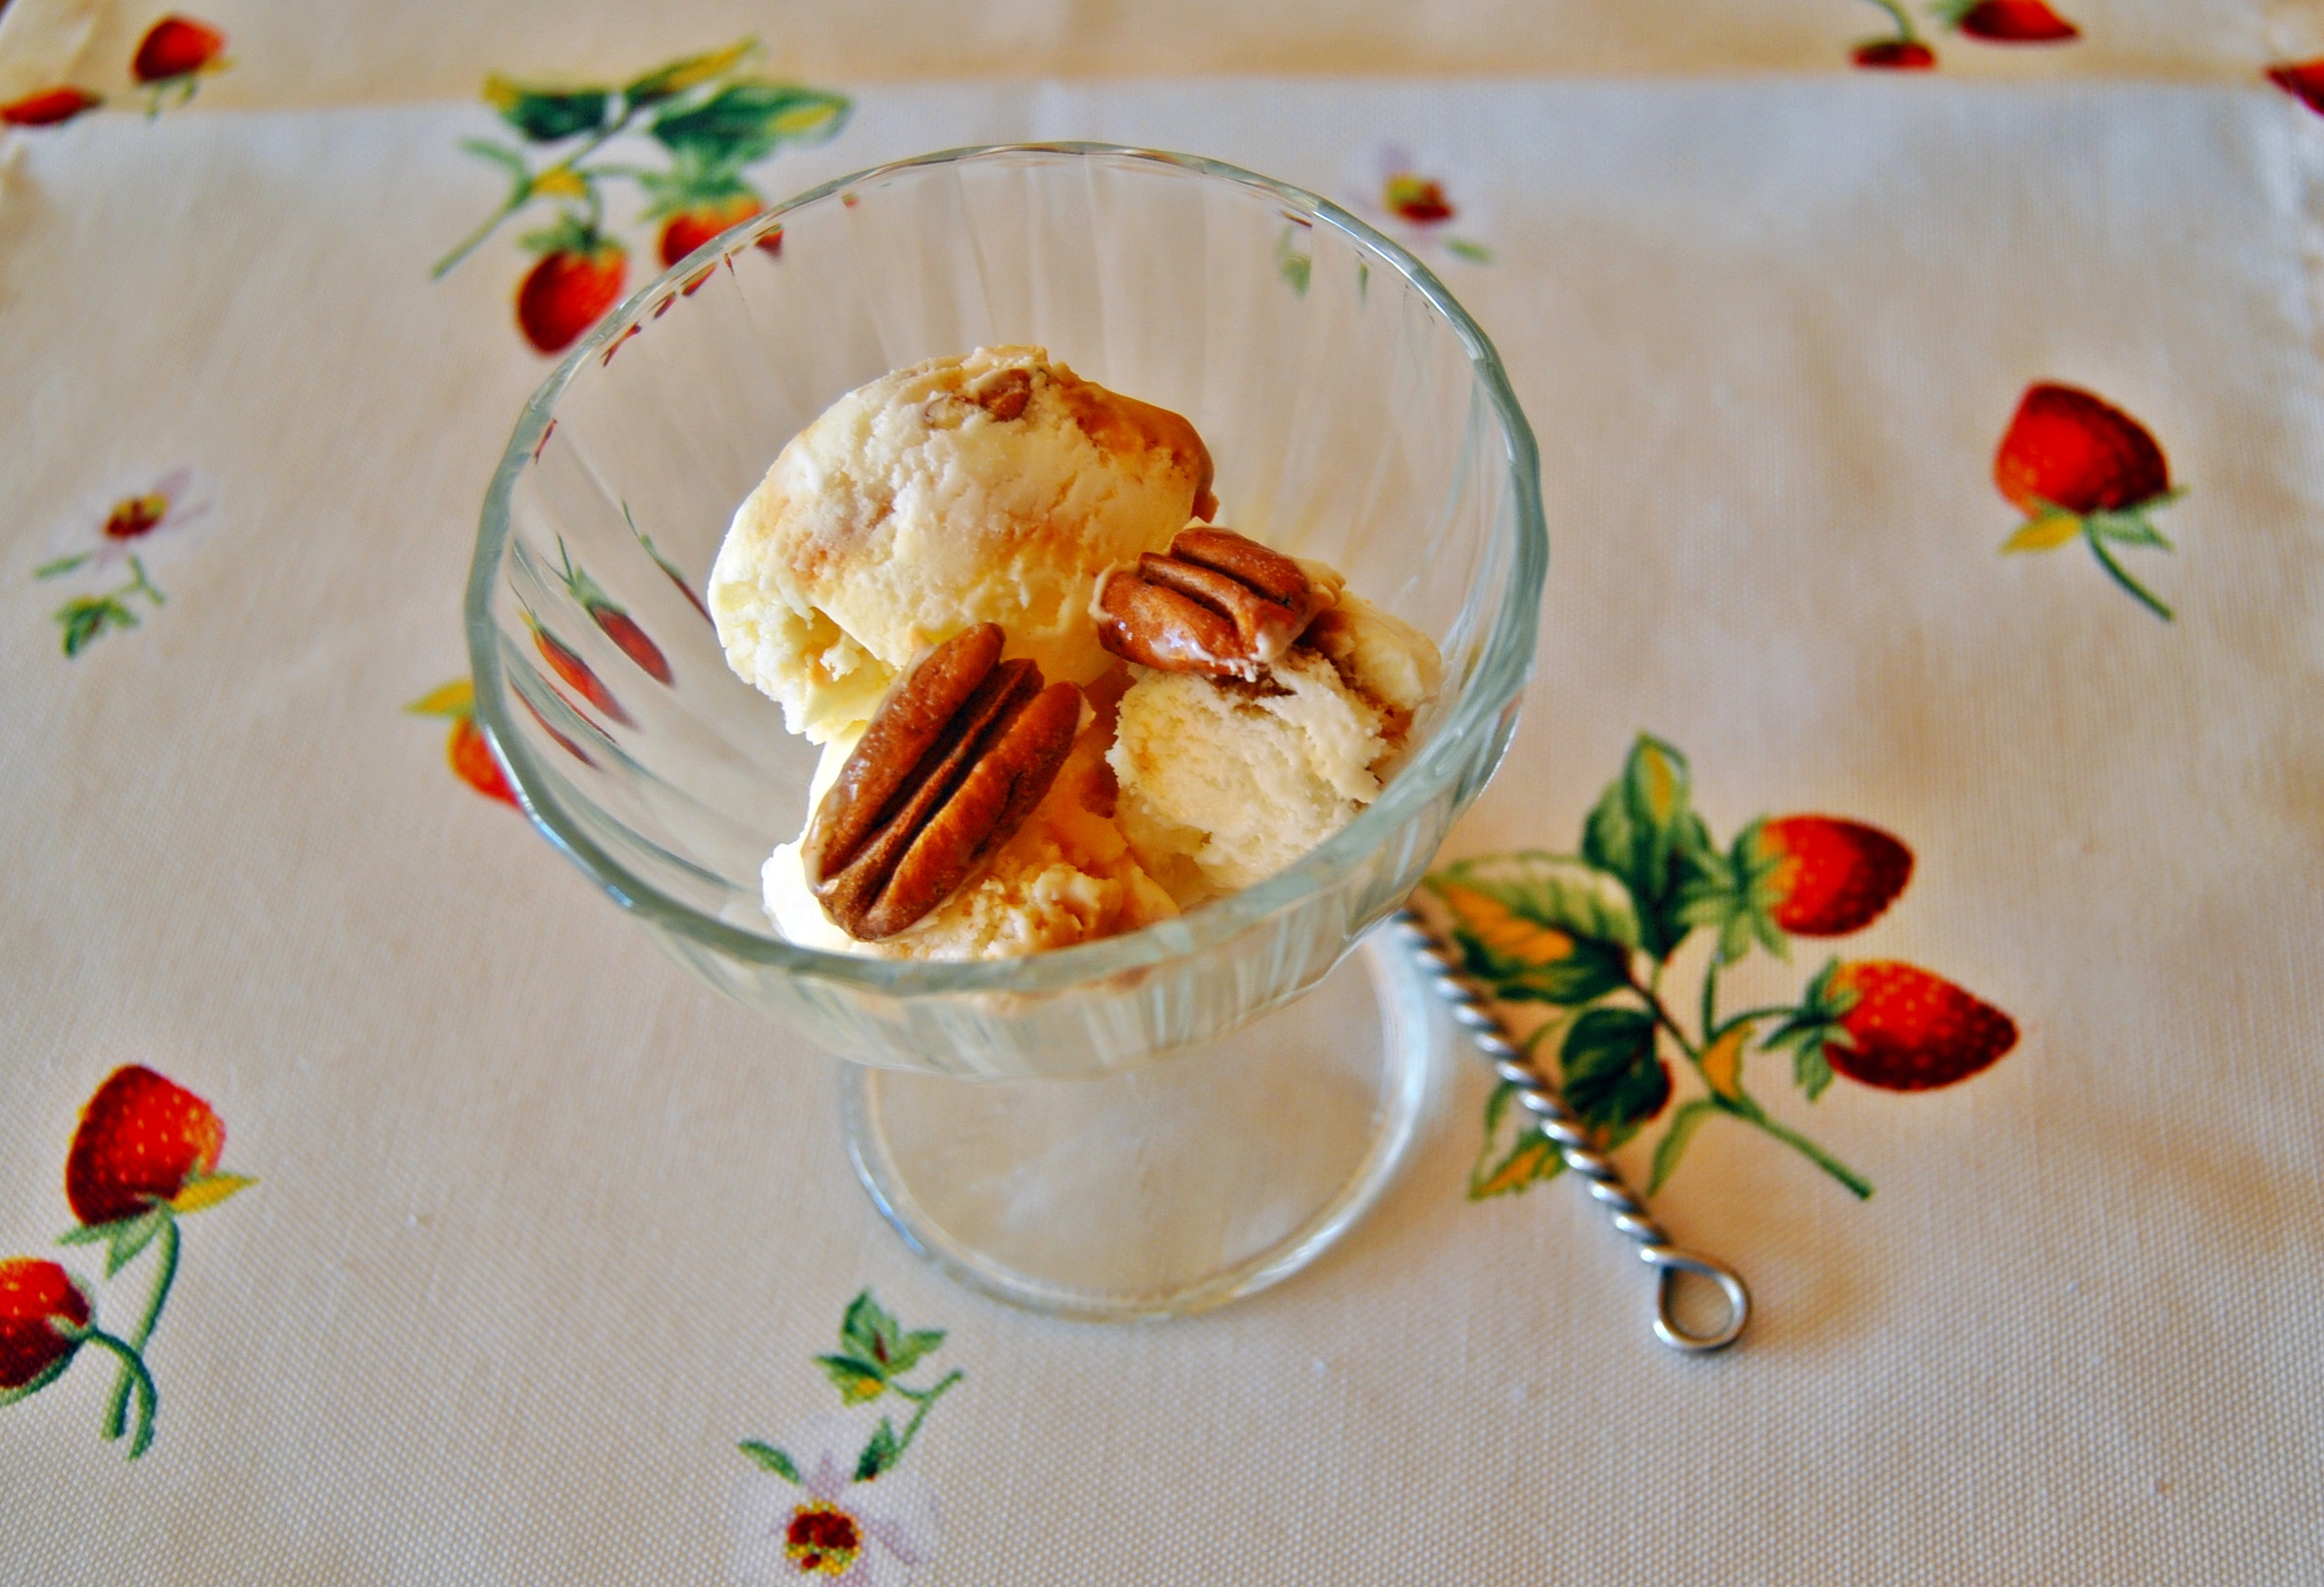
Hello my foodie friends! How are you? Already thinking about Saint Valentine’s day? I’ve skipped that one and I already have my mind on summertime! If you are craving some summer treats too, here’s a recipe that may help you out: a scrumptious vanilla ice cream with a dense and rich caramel sauce and chopped pecans.

vanilla-icecream-toffee

I really love eating ice cream all year long. Why waiting till summer? Ice cream is one of the best sweets on earth, and it should be eaten anywhere we want! Besides, I think ice cream is one of those sugary treats that come really handy when hosting a party or a dinner with friends. You can make the recipe days ahead, having only to scoop and serve it without any fuss.

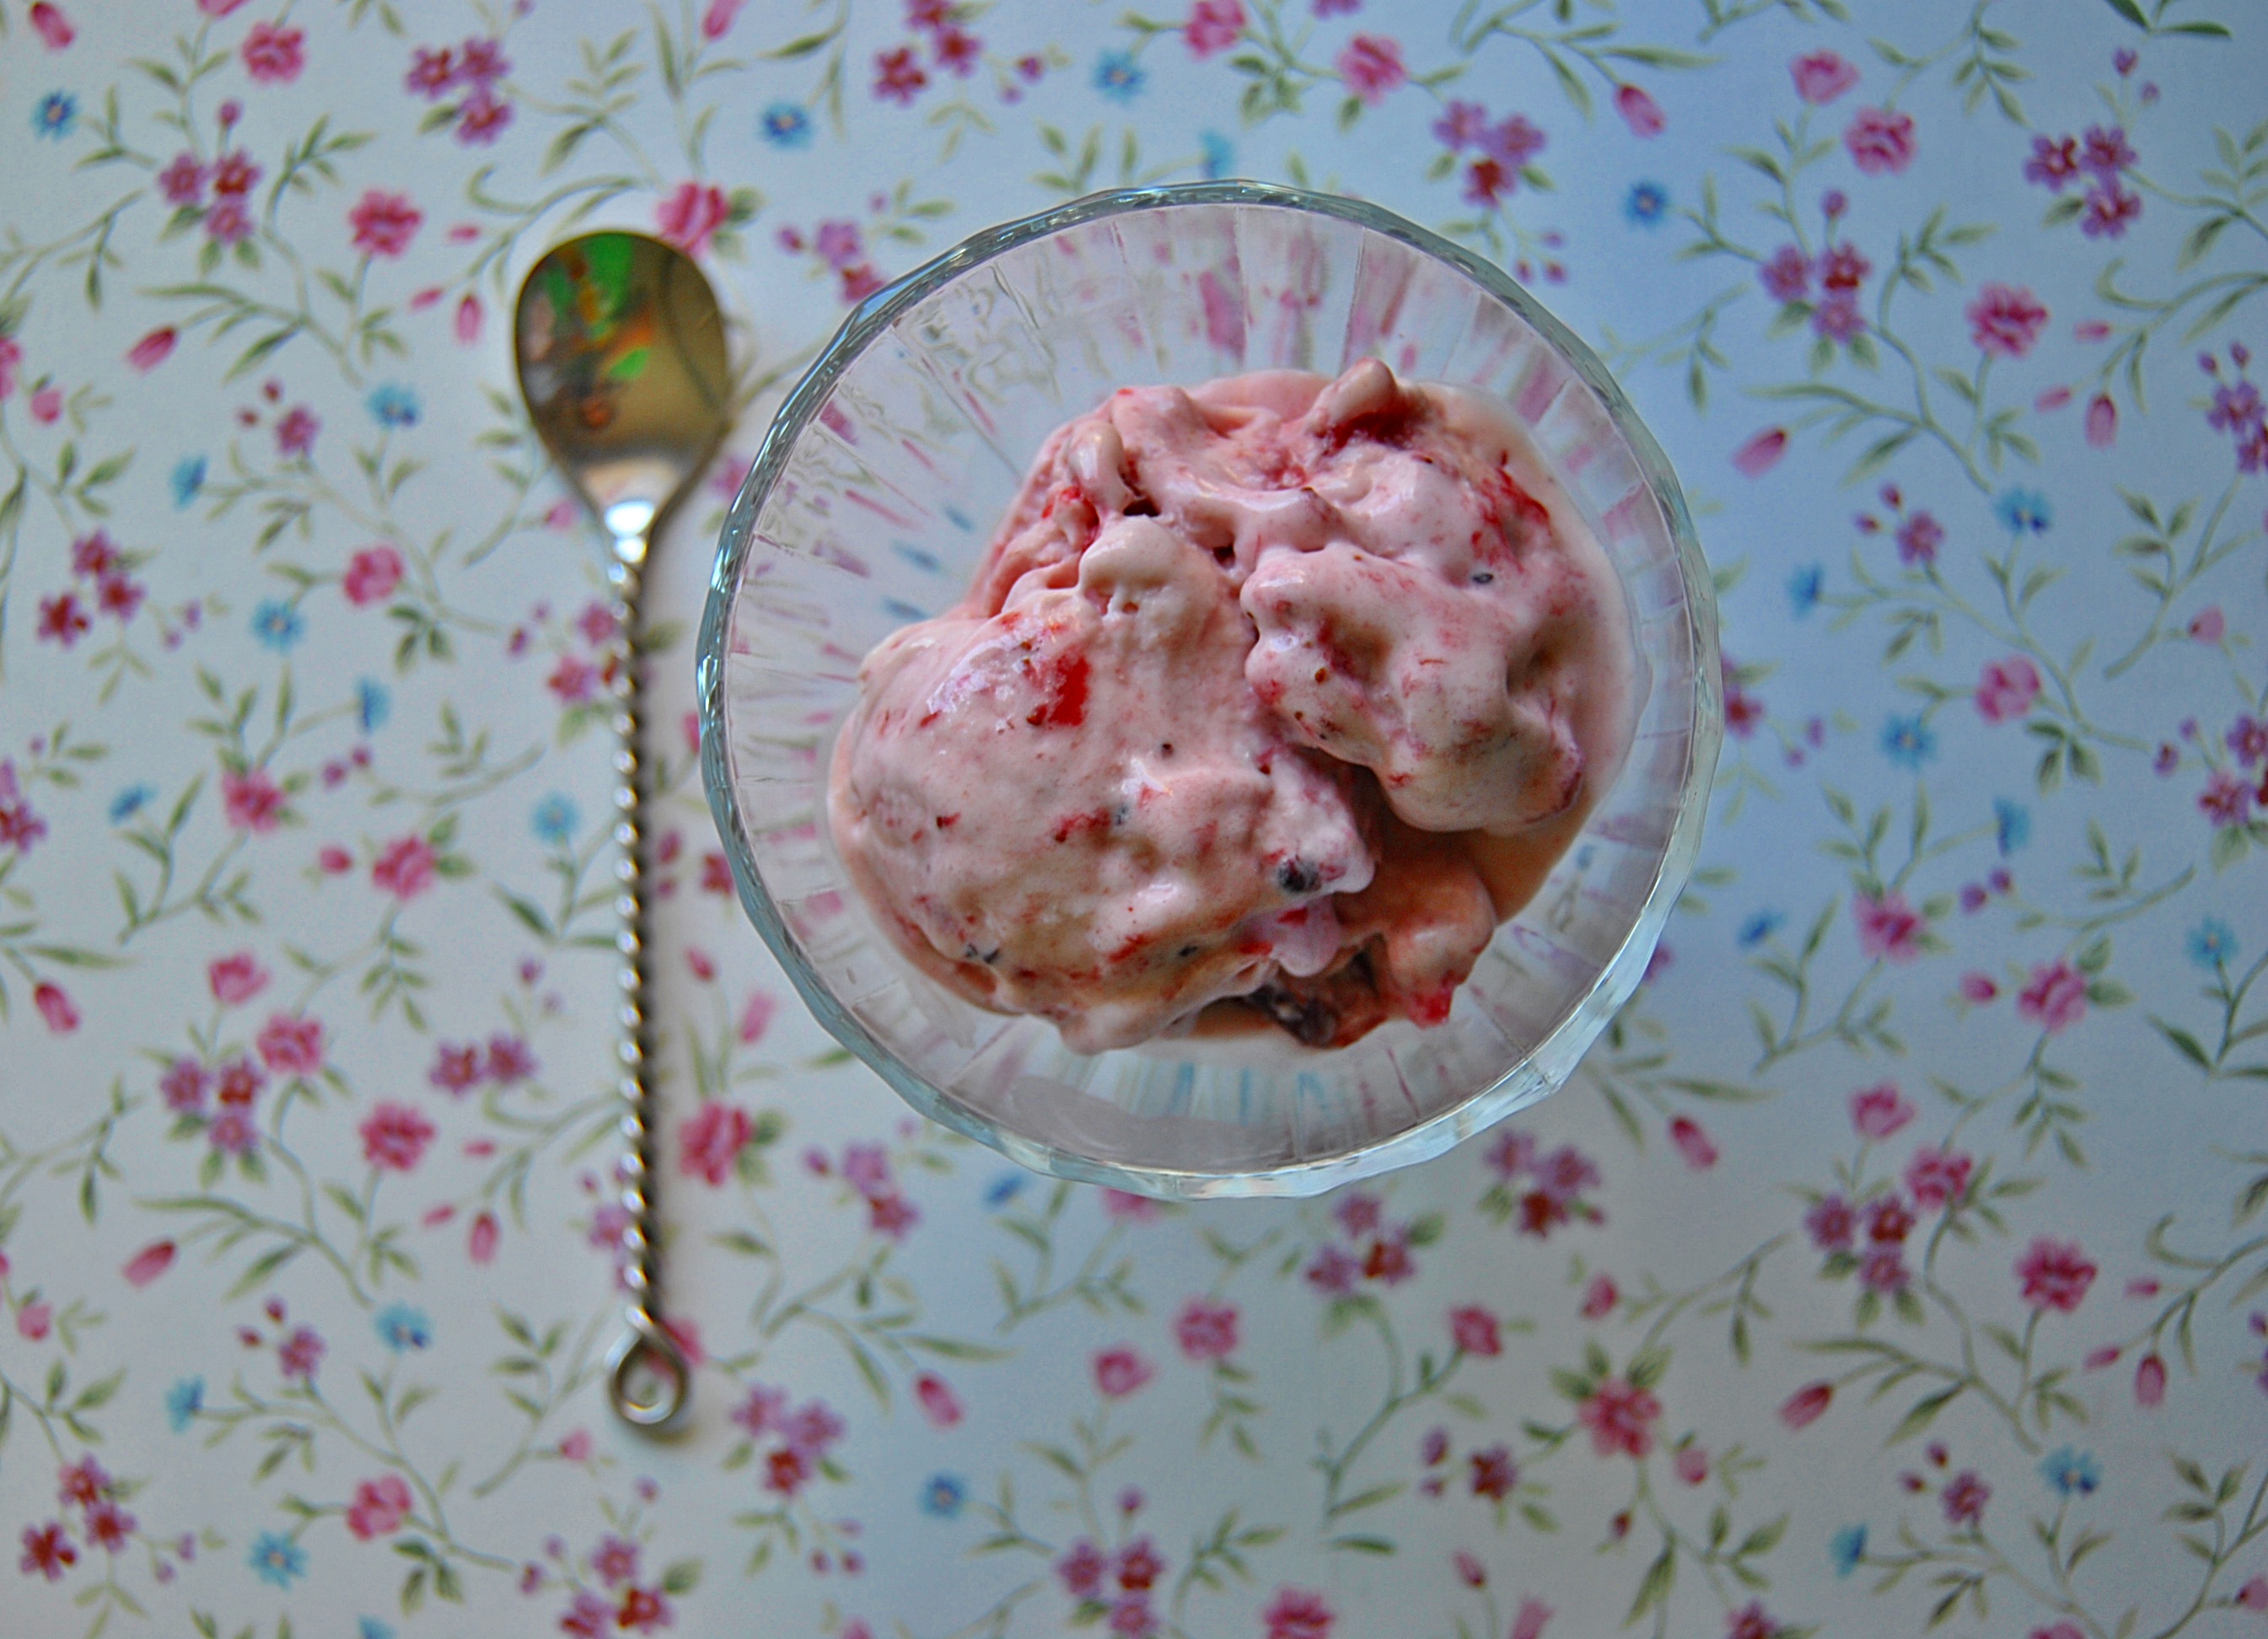
It is also very versatile, and open to dozens of combinations to make everyone happy. I must admit I tend to use my vanilla ice cream recipe as the base and then add what I’m craving at the moment, like in this recipe, or this one. I have tried two very different recipes this Christmas and I really need to share them with you because both of them are winners (one involves lime, and the other one Nutella…), but I won’t be able to make them again until I’m back home since I left my ice cream maker there.

vanilla-toffee-icecream

In the meantime, let’s take a look at this recipe. I have to admit it may be one of my favorites yet… It might have something to do with the caramel sauce. I don’t know what has gotten to me but I keep craving caramel. This ice cream recipe helped calm down those craving since I hag enough caramel sauce leftover to bath in it. Concerning the pecans, you could totally replace them for any other nuts. I wouldn’t omit them since they give a nice crunchiness to the ice cream recipe. Either with or without pecans, you should totally try this ice cream!

Hope you like the recipe! See you soon.

RECIPE

180ml whole milk (room temperature)
240gr white sugar
350 ml heavy cream (cold)
1 TB vanilla extract
155gr butter
225gr white sugar
A pinch of salt
240ml heavy cream
Chopped pecan nuts, to taste

  1. In a big bowl combine the sugar and the milk with a whisk until the sugar has dissolved (or as much as you can). Leave aside.
  2. Using a hand mixer, whisk the heavy cream until soft peaks form. It does not have to be completely whipped.
  3. Transfer the semi-whipped cream to the bowl where the milk is. The cream will lose some of its consistency but don’t worry, it’s ok.
  4. Stir in the vanilla extract and mix it until it all comes together.
  5. Put the mixture in your ice cream maker and let it work for about 25 – 35 minutes or until it has a soft, creamy texture. Transfer the ice cream to a freezer safe container and leave it in your freezer 1h.
  6. While the ice cream is cooling down, make the toffee sauce: In a saucepan melt the butter with the sugar over medium heat.
  7. Stir the mixture until it has a golden-brown color. At some point the butter may separate from the sugar, but don’t worry, it’s normal.
  8. Once the sauce has that ambar color, remove the saucepan from the heat and add the salt and the heavy cream very carefully, stirring constantly. Let the sauce cool completely.
  9. Remove the ice cream from the frezer and add some chopped nuts and some toffee dollops, make swirls with a knife.
  10. Freeze another 4 hours before serving.
  11. ENJOY!


toffee-icecream

¡Hola amigos cocinillas! ¿Qué tal os va? ¿Pensando ya en San Valentín? Yo me he saltado esa celebración y me he ido directamente al verano. Si sóis como yo y tenéis ganas de recetas veraniegas, os va a encantar este helado de vainilla con salsa de caramelo y nueces pecanas.

Me encanta tomar helado durante todo el año, me parece un tontería tener que esperar al verano y sólo poder disfrutarlo un par de meses. No sólo es uno de mis dulces favoritos, además es muy apañado para fiestas y cenas con amigos ya que podemos dejarlo listo días antes y en el momento de servir el postre sólo hay que poner un par de bolas en una copa y decorar. Nada de andar con el horno de arriba pa’ abajo.

Además de ser práctico el helado es un postre muy versátil: podemos crear decenas de combinaciones de sabores para contentar a todo el personal. Admito que yo suelo usar mi receta de helado de vainilla como base y luego añado los ingredientes que más me apetezcan en el momento. Pero también he probado otras recetas, en navidad preparé un delicioso y refrescante helado de lima y otro mucho más peligroso de Nutella. En cuanto vuelva a Coruña y tenga a mano mi fantástica heladera, los volveré a hacer y compartiré la receta.

helado-vainilla-caramelo

En cuanto a esta receta, la clave está en la salsa de caramelo. Es muuuuy importante que la vigiléis bien mientras la hacéis, y que no le tengáis miedo. Las cantidades que os pongo aquí son suficientes para el helado y para que os sobre más salsa para echarla por encima (o comerla a cucharadas… ejem, ejem). Las nueces pecanas podéis sustituírlas por otro fruto seco que os guste, pero no os aconsejaría eliminarlas (salvo si sóis alérgicos) porque le dan un toque crujiente a la receta. Hagáis como lo hagáis, ¡espero que os animéis a probar esta receta!

Nos vemos pronto, un abrazo!

RECETA

180ml de leche entera (a temperatura ambiente)
240gr de azúcar blanco
350ml de nata para montar (bien fría)
1 cucharada de extracto de vainilla
115gr mantequilla
225gr azúcar blanco
Pizca de sal
240ml nata para montar
Nueces pacanas picadas, al gusto

  1. En un bol grande mezclar el azúcar y la leche con unas varillas hasta que el azúcar se haya disuelto (si no por completo, al menos parcialmente). Apartar el bol.
  2. Usando una batidora de varillas, montar la nata ligeramente. No tiene que estar completamente firme.
  3. Echar la nata semi-montada en el bol de la leche, mezclar con cuidado. La nata perderá parte de su firmeza, pero no hay que preocuparse, es normal.
  4. Añadir la vainilla a la leche con lanata y mezclar hasta que esté bien repartida.
  5. Poner la masa de helado en la heladera, dejar que trabaje unos 25 – 35 minutos o hasta que tenga una textura cremosa y suave. Pasar el helado a un envase hermético y dejarlo en el congelador 1h.
  6. Mientras el helado se enfría, haced la salsa de caramelo. Poned en un cazo la mantequilla y el azúcar y dejad que se derrita a fuego medio. Removed constantemente para que no se queme el azúcar.
  7. El caramelo tiene que alcanzar un color ámbar; en algún punto de la cocción, la mantequilla se puede separar del azúcar pero no os preocupéis, seguid removiendo que se volverá a mezclar todo.
  8. Una vez esté dorado, sacad el cazo del fuego y añadir la sal y la nata con mucho cuidado, removiendo para que no se queme. Cuando esté la nata bien incorporada, dejad que el caramelo enfríe a temperatura ambiente.
  9. Sacad el helado del congelador, echad las nueces picadas y cucharadas de caramelo, removiendo ligeramente con un cuchillo para que queden semi-mezclados en el helado.
  10. Volved a meterlo en el congelador, y dejadlo unas 4 horas antes de servir.
  11. ¡QUE APROVECHE!


vainilla-caramelo-helao

Peaches and Cream Popsicles ~ Polos de Melocotón y Nata

*Podéis encontrar esta receta en castellano al final del post.

Good Monday, everybody! How was your weekend? Are you ready to start a new week? It might be easier with these Peaches and Cream Popsicles:

peaches cream popsicles

I hope you all had a great weekend. Mine was pretty good, too. On Friday afternoon I went to the beach with some friends and had a wonderful, relaxing time. Then we headed for a concert near the beach which ended well along into night. But we had a blast! Since Friday was quite a long day, I spent Saturday and Sunday watching films and recovering from the party, haha.

One thing that helps it’s having sweet goods at home, better if they are homemade! Like these peaches and cream popsicles. I found this recipe in Pinterest (which, if you know me well, you know I’m a big fan of). At first I had my doubts about this recipe because I was afraid the popsicles would taste too much like cream (which I really despise). However, the simplicity of the recipe made me give it a chance.

peaches popsicles

I don’t regret trying this recipe at all! Although it is very easy to make, the result is a very refreshing and sweet popsicle. Also, you don’t need an ice cream machine to make this recipe! That’s a plus, huh? You don’t even need to own popsicle molds. You could use paper cups and coffee spoons. I got mine in IKEA a couple of days ago, and I love them. They were cheap, they are the perfect size and they are easy to wash!

For this recipe, it is mandatory that you use good peaches. You want them mostly ripe as that way their sweetness will be guarantee. Don’t buy them in a huge mass merchandiser. Go to your local grocery store and ask your fruit seller for the sweetest peaches. Buying local is always better 😉

peach popsicle

RECIPE

2 peaches, ripe
360ml whipping cream
2 TB honey

  1. Peel and dice the peaches. Place them in a blender.
  2. Add the whipping cream and blend them together.
  3. Add in the honey one tablespoon at a time, checking to reach desired sweetness.
  4. Pour the mixture into popsicle molds or paper cups and freeze for about 6 hours.
  5. ENJOY!

Recipe adapted from You Made That.

peach popsicles

¡Feliz lunes, gente! ¿Qué tal vuestro fin de semana? ¿Estáis listos para una nueva semana? Quizás os sea más fácil con estos polos de melocotón y nata.

Espero que hayáis tenido un buen fin de semana. El mío ha estado bastante bien, el viernes por la tarde fui a la playa con unas amigas y después ya enganchamos con un concierto que había cerca. Al final acabamos la fiesta bastante entrada la noche. ¡Pero nos lo pasamos pipa! Y como el viernes fue un día tan movidito, el sábado y el domingo estuve en casa viendo pelis de chicas, jaja.

Una cosa que ayuda a recuperar la energía perdida es tener cosas dulces por casa, sobre todo si son caseras, como por ejemplo estos polos de melocotón y nata. La receta la encontré en Pinterest, del que, si me conocéis bien, sabréis que soy super fan. Al principio tuve mis dudas con esta receta, me temía que los polos supiesen demasiado a nata (que no soporto)… Sin embargo eran tan sencillos de hacer que no pude resistirme.

¡Y me alegro de no haberlo hecho! La receta es muy, muy sencilla y el resultado es inmejorable. Los polos son a la vez refrescantes y dulzones, ¡un 10 vamos! Además, no se necesita una heladera para hacer esta receta. Tener moldes de polo tampoco es obligatorio. Podéis usar vasos de plástico y cucharillas de café a modo de palito. Mis moldes son de IKEA y la verdad es que estoy muy contenta: fueron muy baratos, tienen el tamaño perfecto y son muy fáciles de limpiar.

Para esta receta es obligatorio que uséis melocotones buenos. Es importante que estén bien maduros para que tengan ese sabor dulzón tan caracterísitico de la fruta. Os aconsejo comprarlos en una frutería, nada de ir a por ellos al gigahipermercado. Hay que apoyar a los pequeños negocios.

Bueno, aquí os dejo la receta. ¡Espero que os animéis!

RECETA

2 melocotones, bien maduros
360 ml de nata para montar
2 cdas de miel

  1. Pelad y cortad los melocotones. Poned los pedazos en una batidora.
  2. Añadid la nata y batidlo todo junto.
  3. Echad la miel cucharada a cucharada, probando hasta que alcancéis la dulzura que más os guste.
  4. Poned la mezcla en los moldes de polo o en los vasos de plástico.
  5. Dejad en el congelador al menos 6 horas.
  6. ¡BUEN PROVECHO!


Roasted Strawberries Ice Cream ~ Helado de Fresas Asadas

*Podéis encontrar esta receta en español al final de la entrada.

Hi everyone! How are you doing? I still can’t believe we are already in August. Crazy, huh? Seems like time flies when you are having fun… or when you are eating ice cream! Today I bring you: Roasted Strawberries Ice Cream.

roasted strawberries ice cream

I remember when I bought the ice cream machine. I kept it in its box for a week, not sure if I wanted to return it or not. I wasn’t convinced that I would use it at all. Sometimes it happens, you know… You buy stuff and end up using it once. I didn’t want it to happen again, and not with the ice cream maker that needed quite a lot space in my cabinets…

Oh my! I am so, so, so very glad I decided to keep it! Making ice cream is now so fast and easy! I only need to put the ice cream maker vase in the freezer the night before making ice cream. Next morning I just buy all the ingredients I need, make the recipe and throw the batter into the ice cream machine. 30 minutes churning, back to the freezer and in 3 – 4 hours I have delicious, homemade and healthy ice cream ready to dive in!

roasted berries

As you can already tell from the picture, I added some blueberries to my batch. I had some mixed berries left from another recipe so I decided to throw them in. Either with extra berries or just the strawberries, this ice cream tastes like heaven. Seriously, once you have tried homemade ice cream, it is reaaaaaally difficult to get back to the store-bought one… Homemade is always the best choice 😉

Again, you do not need an ice cream maker to make this recipe (or any other). It will take you longer since you’ll have to churn the ice cream manually to break all the crystals that form while freezing. Still, the flavor will be as good as with a machine.  This ice cream tastes like a good strawberry milkshake. Since they are roasted, the strawberry chunks you’ll find in the ice cream are soft and rich in flavor.

So, here I am, once again, trying to get you into the kitchen to make this recipe as soon as possible! Believe me, you will thank me later!

roasted strawberries ice cream

PS. Can you see my reflection in the spoon? Cool, huh?

RECIPE

450gr strawberries
100gr white sugar
180ml milk, room temperature
240gr white sugar
350ml whipping cream, cold
1/2 TB vanilla extract

  1. The first thing we need to do is to roast the strawberries. For this, preheat your oven to 230ºC.
  2. Wash and dry the strawberries, then dice them. Throw them in a oven try and sprinkle the sugar on top. Give them a few shakes so the strawberries are evenly coated in sugar.
  3. Bake them for about 15 – 20 minutes. You want them to be soft but still be able to tell the pieces apart. Set aside and let them cool down.
  4. In a medium size bowl mix the milk with the sugar (the 240gr). Whisk it hard until all the sugar has disolved. Add the vanilla extract.
  5. Whisk the whipping cream until soft peaks form. Carefully add it to the milk mixture, trying to keep the cream whipped.
  6. Put the mixture in your ice cream maker and follow the instructions from the manufacturer.
  7. Pour the semi-solid ice cream in a freezable container. Add in the roasted strawberries. Now you can either mix it well or just give it a few swirls, your choice. Leave in the freezer for at least 4h.
  8. *If you don’t own an ice cream maker, pour the milk and cream mixture into a freezable container, add in the roasted strawberries and mix it well. Put it into the freezer. Every 45 minutes for about 4 hours take it out and whisk the mixture to break the ice crystals that will be formed on the surfuce. Repeat the process until the ice cream is firm.
  9. ENJOY!

Recipe adapted from Baked by Rachel.

4.7

¡Hola! ¿Cómo lo lleváis? Yo todavía estoy que no me creo que estemos en agosto ya… ¡Qué rápido pasa el tiempo cuando se es feliz! Y cuando se come helado ya ni os cuento… jaja. Aquí os dejo mi receta de Helado de Fresas Asadas.

Recuerdo que cuando me compré la máquina para hacer helados la tuve en su caja una semana, con ticket y todo. No estaba segura de si le iba a dar uso de verdad. A veces pasa, ¿verdad? Compramos utensilios, los usamos un día y al cajón. Nunca más se sabe de ellos. No quería que me pasase eso con la heladera, sobre todo porque ocupa lo suyo y me roba espacio en el armario.

¡Menos mal que decidí quedármela! De las mejores compras que he hecho, sin lugar a duda. ¡Hacer helado casero es tán rápido y tan sencillo con la heladera! Lo único que tengo que hacer es meter el bol de la heladera en el congelador la noche antes de hacer la receta. A la mañana siguiente bajo a comprar los ingredientes necesarios y me pongo manos a la obra. 30 minutos en la heladera y unas 4 horas en el congelador y listo: delicioso helado casero y super sano.

Como podéis ver en una de las fotos en esa ocasión añadí unos frutos rojos que tenía por casa de otras recetas. Ya sea con las fresas solas o con el añadido de los frutos rojos (arándanos, frambuesas, grosellas…) este helado sabe a gloria. En serio, una vez probéis helado casero os costará mucho volver al comprado. En este caso, este helado sabe a fresas de verdad. Ni colorantes, conservantes, aromatizantes… Nada de cosas raras.

De nuevo os comento que NO se necesita una heladera para hacer helado casero. Os llevará más tiempo, eso sí, pero el sabor y la textura será la misma. En este caso, este helado sabe como a un buen batido de fresa. Ya que las fresas van asadas, los trocitos que os encontraréis serán blanditos pero llenos de sabor.

En fin, una vez más aquí me hallo, intentando que os animéis a cocinar y a probar esta receta mientras dure el verano. Creedme, me lo agradeceréis. 😉

RECETA

450gr fresas
100gr azúcar blanco
180ml leche entera, temperatura ambiente
240gr de azúcar blanco
350ml de nata para montar
1/2 cda de extracto de vainilla

  1. Para hacer esta receta lo primero es asar las fresas. Empezad precalentando el horno a 230ºC.
  2. Lavad, secad y cortad las fresas. Echadlas en una fuente para horno y espolvoreadlas con el azúcar. Dadles un par de vueltas para que todas las fresas tengan azúcar.
  3. Asadlas en el horno unos 15 – 20 minutos. Las fresas tienen que estar blanditas pero que todavía conserven la forma. Dejad que enfríen por completo.
  4. En un bol mediano mezclad la leche con el azúcar. Removed bien hasta que el azúcar se haya disuelto. Añadid el extracto de vainilla.
  5. En otro bol montad la nata. Con cuidado de que no pierda forma, añadid la nata a la leche con azúcar.
  6. Pasad la mezcla a la heladera y seguid las instrucciones del fabricante.
  7. Una vez pasado el tiempo necesario en la heladera, echad el helado en un tupper. Añadid las fresas asadas y removed para que se mezcle todo bien. (También podríais dejarlo semi-mezclado para que quedase bicolor).
  8. Meted el tupper en el congelador y dejad que el helado se solidifique, unas 3 o 4 horas.
  9. *Si no tenéis una heladera, mezclad las fresas asadas con la nata y la leche. Pasad la mezcla a un tupper y metedlo en el congelador. Cada 45 minutos y durante unas 3 – 4 horas sacad el helado del congelador y batid bien la masa para romper los cristales de hielo que se formarán en la superficie del helado. Repetid el proceso hasta que se haya solidificado.
  10. ¡BUEN PROVECHO!

Esta receta es una adaptación de Baked by Rachel.

helado fresas asadas